The Accu-Chek Guide is a user-friendly blood glucose meter designed for people with diabetes, offering precise glucose monitoring and seamless integration with the MySugr app for efficient diabetes management.
Overview of the Accu-Chek Guide Blood Glucose Meter
The Accu-Chek Guide Blood Glucose Meter is a portable and user-friendly device designed to measure blood glucose levels accurately. It features a large, easy-to-read display and uses Accu-Chek Guide test strips with an easy-edge dosing area for convenient blood application. The meter offers customizable test reminders, data storage for up to 720 results, and wireless syncing capabilities via the MySugr app. Its compact design and intuitive interface make it ideal for daily glucose monitoring, providing reliable results to help users manage their diabetes effectively. The system is supported by a range of resources, including instructional videos and user manuals, ensuring a seamless experience for all users.
Key Features of the Accu-Chek Guide System
The Accu-Chek Guide system offers several key features that enhance user experience and diabetes management. It includes a wireless blood glucose monitoring system, allowing seamless data transfer to the MySugr app. The meter is equipped with a large, backlit display and a strip port light for easy testing in low-light conditions. It supports multiple test sites, such as the fingertip, palm, and upper arm, providing flexibility for users. The system also features customizable test reminders and automatic time and date settings, ensuring accurate tracking and monitoring. Additionally, the Accu-Chek FastClix lancing device is compatible with the meter, offering a convenient and virtually pain-free blood sampling process. These features collectively make the Accu-Chek Guide a comprehensive and user-friendly diabetes management tool.
Importance of Proper Use for Accurate Readings
Proper use of the Accu-Chek Guide system is essential for obtaining accurate and reliable blood glucose readings. Incorrect handling of test strips, lancets, or the meter itself can lead to misleading results, which may affect diabetes management decisions. Always ensure test strips are stored correctly, not expired, and used as directed. Proper calibration of the meter with each new batch of test strips is also crucial. Additionally, clean and dry fingers, free from residue or lotions, are necessary for precise blood glucose measurement. Following the step-by-step instructions provided in the user manual ensures consistent and accurate results. Regularly reviewing the manual and adhering to Roche Diabetes Care’s guidelines will help maintain the integrity of your readings and support effective diabetes control.

Setting Up the Accu-Chek Guide Meter
Setting up the Accu-Chek Guide involves inserting batteries, setting the time and date, and understanding the meter’s display for accurate functionality and user-friendly operation.
Inserting the Batteries
To power your Accu-Chek Guide meter, locate the battery compartment on the back. Open it by sliding the tab and pulling the door open. Insert two AAA alkaline batteries, ensuring the positive (+) and negative (-) ends are correctly aligned. Close the compartment securely. The meter will automatically turn on, displaying the time and date. If the batteries are low, a low-battery symbol will appear. Replace batteries promptly to maintain functionality. Always use high-quality batteries for optimal performance and accurate readings. Proper battery insertion ensures your meter operates efficiently and provides reliable blood glucose monitoring.
Setting the Time and Date
To set the time and date on your Accu-Chek Guide meter, navigate to the settings menu by pressing and holding the top button. Use the side buttons to scroll through options until you reach the time and date settings. Adjust the hour and minute using the top button and the bottom button for the date, ensuring accuracy, especially for time zones or daylight saving changes. Save your settings and exit. Verify the time and date match your current location for accurate record-keeping. Consult the user manual or contact support if issues arise. Proper time and date settings are crucial for maintaining reliable blood glucose records.
Understanding the Meter’s Display
The Accu-Chek Guide meter features a large, easy-to-read LCD display that shows your blood glucose results, time, date, and other important information. The display is backlit, making it visible in low-light conditions. When you turn on the meter, it will show the current time and date. After performing a test, your glucose result will appear on the screen along with the date and time of the test. The meter also displays symbols for battery status, unit of measure (mg/dL or mmol/L), and error messages. Familiarize yourself with these symbols to interpret your results accurately. Refer to the user manual for a detailed explanation of all display elements.

Using Accu-Chek Guide Test Strips
The Accu-Chek Guide system requires specific test strips designed for accurate glucose measurement. Always use the correct strips, handle them carefully, and store them properly to ensure reliability.
Identifying the Correct Test Strips
The Accu-Chek Guide system requires specific test strips designed for optimal performance. Ensure you use only Accu-Chek Guide test strips, as they are tailored for this meter. These strips feature an easy-edge dosing area, allowing blood application along the yellow window for accurate results. Proper handling is crucial: avoid touching the test area, exposure to moisture, or extreme temperatures. Always check the expiration date on the vial and ensure the strips are stored correctly. Using the correct test strips ensures precise glucose readings, which are essential for effective diabetes management. Refer to the packaging or user manual for confirmation of compatibility with your Accu-Chek Guide meter.
Handling and Storing Test Strips
Proper handling and storage of Accu-Chek Guide test strips are essential for accurate results. Always handle strips by the edges to avoid touching the test area, which can cause contamination. Store the strips in their original vial, tightly sealed to prevent moisture exposure. Keep the vial away from direct sunlight and extreme temperatures. Do not remove strips from the vial unless needed for testing. Ensure the vial is closed properly after each use to maintain humidity control. Never use expired strips, as indicated by the expiration date on the label. Proper storage ensures the strips remain effective for reliable glucose monitoring.
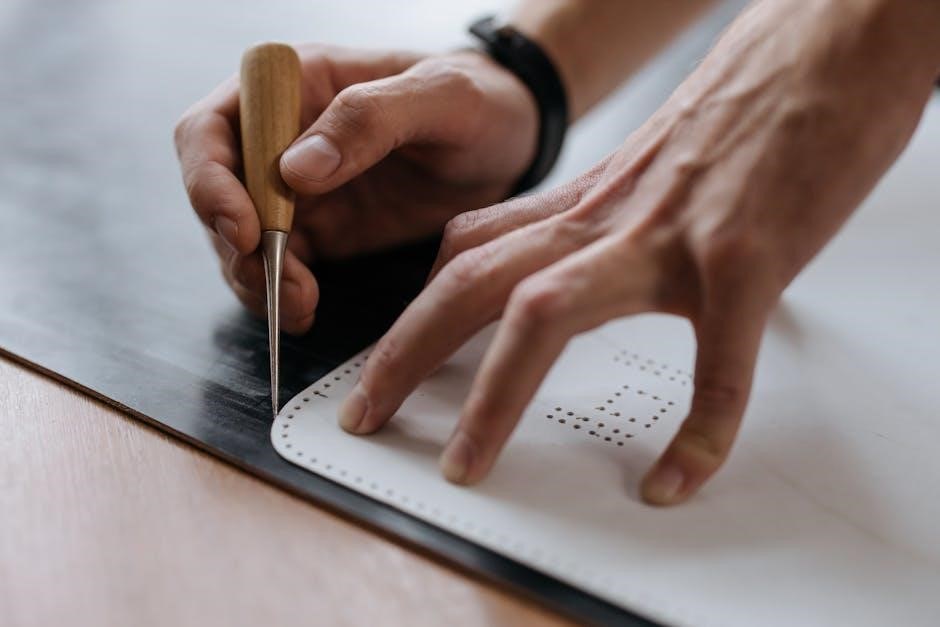
Properly Inserting a Test Strip
Inserting a test strip into the Accu-Chek Guide meter is a straightforward process. Align the yellow edge of the test strip with the meter’s test strip port, ensuring it matches the arrows on the strip. Gently push the strip into the port until it clicks, confirming it is securely seated. The meter will automatically detect the strip and prepare for testing. Always insert the strip with the test area facing downward to ensure proper alignment and function. Once inserted correctly, the meter will be ready to accept a blood sample for accurate glucose measurement. Proper insertion ensures reliable results and optimal performance of the device.

Using the Accu-Chek FastClix Lancing Device
The FastClix device offers a simple, comfortable, and efficient way to obtain blood samples. It is designed for ease of use and minimal discomfort during testing.
Loading the Lancet Drum
Loading the FastClix Lancet Drum is a straightforward process. Open the device by pulling the top cover upward. Insert the drum, ensuring it clicks securely into place. Each drum holds multiple lancets, eliminating the need for frequent replacements. Once loaded, close the cover and prepare for use. Always handle the drum carefully to avoid touching the sharp lancet tips. Proper loading ensures smooth operation and accurate blood sampling. Follow the manufacturer’s guidelines for disposal of used drums. This step is essential for safe and effective use of the FastClix device with your Accu-Chek Guide meter.
Attaching the Lancing Device to the Meter
Attaching the FastClix lancing device to the Accu-Chek Guide meter is simple. Align the device with the meter’s docking area, ensuring it fits snugly. Gently push until it clicks into place; This connection allows for convenient testing and data synchronization. Ensure the device is securely attached to maintain proper function. If unsure, refer to the user manual for guidance. Proper attachment is crucial for accurate blood glucose monitoring and seamless integration with the meter’s features. Always handle the device with care to avoid damage. This step ensures efficient and hygienic testing, making managing diabetes easier and more convenient.
Performing a Fingerstick Blood Sample
Wash your hands thoroughly before performing a fingerstick. Load the FastClix lancet drum with six sterile lancets. Attach the device to the meter as instructed. Choose a clean, dry fingertip, preferably on the side to minimize discomfort. Set the lancing depth based on your skin thickness. Press the lancing device firmly against your finger until you hear a click. Gently squeeze your finger to produce a small blood drop. Avoid using the same finger repeatedly. Apply the blood sample to the test strip’s designated area. Ensure the strip absorbs the blood correctly for accurate results. Proper technique helps minimize pain and ensures reliable glucose readings.

Performing a Blood Glucose Test
Prepare the meter with a test strip, perform a fingerstick, apply a blood drop to the strip, and wait for the glucose reading to display.
Preparing for the Test
Before performing a blood glucose test, ensure the meter is set up correctly and ready for use. Insert a test strip into the meter, following the arrows on the strip and meter for proper alignment. Prepare the lancing device by loading a new lancet drum, ensuring it is securely attached to the meter. Wash your hands thoroughly with soap and water to avoid contamination. Choose a testing site, such as the fingertip, palm, or upper arm, and wipe the area clean with an alcohol swab. Allow the area to air dry before pricking. Handle the test strip carefully to avoid touching the test area. Always follow the user manual instructions for optimal results.
Applying Blood to the Test Strip
Once the test strip is inserted, the meter will activate and be ready to analyze the blood sample. Gently prick your finger or chosen testing site using the lancing device to obtain a small blood sample. Hold the test strip by the handle, ensuring the test area (yellow edge) is facing downward. Touch the blood drop to the yellow edge of the test strip. The meter will detect the sample automatically. Avoid adding more blood once the test has started. If the sample is insufficient, the meter will prompt you to retest. Always handle the test strip carefully to ensure accurate results and proper function.
Reading and Interpreting the Results
The Accu-Chek Guide meter will display your blood glucose result after a few seconds. The result will show on the screen along with the date and time of the test. If your reading is within your target range, the meter will confirm this with a checkmark. If your glucose levels are too high or too low, the meter will alert you with a warning symbol. Use the results to track your glucose trends over time and adjust your diet, exercise, or medication as needed. Always refer to your healthcare provider’s guidelines for interpreting and managing your blood glucose levels effectively;
Maintenance and Care of the Accu-Chek Guide
Regularly clean the meter with a soft cloth to prevent residue buildup. Store the device in a dry place to avoid moisture damage. Always check for errors and ensure proper functionality before use.
Cleaning the Meter
Clean the Accu-Chek Guide meter regularly using a soft, dry cloth to remove dirt or residue. For stubborn spots, dampen the cloth with water, but avoid soaking. Never use harsh chemicals, alcohol, or abrasive materials, as they may damage the screen or internal components. Gently wipe the meter’s surface, paying attention to buttons and crevices where dust accumulates. Allow the meter to air dry completely before use. Avoid exposing the device to excessive moisture, as it may compromise its functionality. Regular cleaning ensures accurate readings and maintains the longevity of your Accu-Chek Guide blood glucose meter.

Storing the Meter and Accessories
Store the Accu-Chek Guide meter and its accessories in a cool, dry place, away from direct sunlight and moisture. Keep the meter in its protective case when not in use to prevent damage. Test strips should remain in their original vial with the cap tightly closed to maintain their effectiveness. Lancets and the FastClix device should be stored separately in a secure, accessible location. Avoid exposing the meter or accessories to extreme temperatures or humidity, as this may affect their accuracy. Always ensure the meter and its components are stored safely out of reach of children and pets.
Troubleshooting Common Issues
If the Accu-Chek Guide meter displays an error message, such as “E-1” or “E-2,” restart the device by removing and reinserting the battery. Ensure the test strip is correctly inserted and not expired. If readings are inconsistent, check the test strip lot number and verify proper storage conditions. For blood sample issues, ensure the strip is fully saturated with blood. Connectivity problems with the MySugr app can be resolved by restarting both the meter and the app. For persistent issues, consult the user manual or contact Roche Diabetes Care customer support for assistance. Regularly updating the app and meter software can also resolve many common issues.

Using the Accu-Chek Guide with MySugr App
The Accu-Chek Guide seamlessly connects to the MySugr app, allowing wireless syncing of blood glucose data for comprehensive diabetes management. This integration simplifies tracking and provides insightful reports.
Syncing the Meter with the App
Syncing the Accu-Chek Guide meter with the MySugr app is a straightforward process. First, ensure the app is installed on your device and Bluetooth is enabled. Open the app and navigate to the settings or connectivity section. Select the option to pair a new device and choose the Accu-Chek Guide from the list of available devices. Follow the on-screen instructions to complete the pairing process. Once connected, your blood glucose data will automatically sync to the app, allowing you to view, track, and manage your readings in one place. This seamless integration enhances your diabetes management experience.
Viewing and Managing Data
The MySugr app allows you to easily view and manage your blood glucose data from the Accu-Chek Guide meter. Once synced, your readings are automatically uploaded and organized in a clear timeline. You can view daily, weekly, or monthly trends, set reminders for testing, and add notes to track factors like meals or exercise. The app also generates reports that can be shared with healthcare providers for better decision-making. Customizable dashboards and insights help you understand your glucose patterns, while notifications alert you to high or low readings, ensuring proactive management of your diabetes care.

Safety Precautions and Disposal
Proper disposal of used lancets and test strips is essential. Use a puncture-proof container for lancets and dispose of test strips safely. Handle the meter with care, avoiding extreme temperatures and moisture. Keep it out of reach of children and ensure it remains clean and undamaged for accurate readings.
Proper Disposal of Used Lancets and Strips
Dispose of used lancets and test strips responsibly to ensure safety and environmental protection. Used lancets should be placed in a puncture-proof container, such as a sharps container, to prevent injury. Test strips should be disposed of in regular household waste. Avoid recycling used lancets or strips, as they may contain biological material. Always follow local regulations for medical waste disposal. Keep disposal containers out of reach of children and pets. Proper disposal helps prevent contamination and ensures a safe environment for everyone. Refer to local guidelines for specific instructions on handling and disposing of diabetes-related waste.
Safety Tips for Handling the Meter
Always handle the Accu-Chek Guide meter with care to ensure longevity and accuracy. Avoid exposing the meter to extreme temperatures, moisture, or direct sunlight, as this may damage the device. Clean the meter regularly with a soft, dry cloth to prevent contamination. Never share the meter or its accessories with others to maintain hygiene. Handle the screen gently to avoid scratches. Store the meter in its protective case when not in use. Keep the device out of reach of children and pets. Use only authentic Accu-Chek accessories to ensure proper functionality. Follow all safety guidelines provided in the user manual for safe operation.
Additional Resources and Support
Access user manuals, guides, and troubleshooting tips on the official Roche Diabetes Care website. Contact customer support for assistance with your Accu-Chek Guide meter and app integration.
Accessing User Manuals and Guides
The Accu-Chek Guide user manual and additional guides are available on the official Roche Diabetes Care website. Visit the support section to download PDF versions or request printed copies. These resources provide detailed instructions for setting up, using, and troubleshooting the meter. You can also find quick-start guides and video tutorials to help you master the device. Ensure you refer to the correct manual for your specific meter model, as features may vary. For convenience, save the manual on your device or print it for easy access. This ensures you always have guidance at hand for optimal use of your Accu-Chek Guide system.
Contacting Customer Support
For assistance with your Accu-Chek Guide, contact Roche Diabetes Care customer support at 1-800-858-8072, available Monday-Friday, 8AM-8PM ET. Visit their official website for more details.
You can also access the support section on Roche’s website for FAQs, user manuals, and troubleshooting guides. Additionally, live chat and email options are available for convenient support.
For immediate help, call the toll-free number or refer to the resources provided on their platform. Customer support is here to ensure your Accu-Chek Guide experience is smooth and hassle-free.
The Accu-Chek Guide simplifies blood glucose monitoring with its user-friendly design and advanced features, empowering individuals with diabetes to manage their condition effectively and confidently.
Setting up the Accu-Chek Guide involves inserting batteries and setting the time and date. Use Accu-Chek Guide test strips, ensuring proper handling and storage. Load the lancet drum in the FastClix device, attach it to the meter, and perform a fingerstick blood sample. Insert the test strip into the meter, apply blood to the edge, and wait for results; Regularly clean the meter, store it safely, and troubleshoot common issues. Sync the meter with the MySugr app for data management. Properly dispose of lancets and strips, and follow safety precautions. Refer to user manuals and contact support for additional assistance.
Encouragement for Regular Monitoring

Regular blood glucose monitoring is essential for effective diabetes management. Using the Accu-Chek Guide consistently helps you track glucose levels, identify patterns, and make informed decisions. Its user-friendly design and integration with the MySugr app simplify monitoring, enabling better health outcomes. By staying committed to regular testing, you can maintain glucose control, reduce complications, and improve your quality of life. Remember, every test provides valuable insights, helping you take charge of your diabetes journey. Stay consistent, and let the Accu-Chek Guide be your reliable partner in achieving your health goals.