Discover free PDF plans for wooden tool chests, offering step-by-step guides to build durable, customizable storage solutions․ Perfect for organizing tools, these designs cater to all skill levels, ensuring functionality and style․
Overview of the Importance of Tool Chests
Tool chests are essential for organizing and protecting tools, ensuring they remain accessible and secure․ They help maintain workshop efficiency by keeping tools tidy and within reach, preventing loss or damage․ A well-structured tool chest enhances productivity and prolongs tool lifespan, making it a vital investment for any woodworking or DIY project․
Why Choose Wooden Tool Chests
Wooden tool chests offer durability, timeless aesthetics, and customization options․ They provide a natural, eco-friendly storage solution that complements any workspace․ With proper care, wood tool chests can last for decades, making them a practical and sustainable choice for organizing tools effectively․
Benefits of Building a Wooden Tool Chest
Building a wooden tool chest offers durability, customization, and eco-friendliness․ It provides organized storage, enhances workspace aesthetics, and allows personalization to meet specific needs, ensuring long-term functionality and satisfaction․
Cost-Effectiveness and Durability
Building a wooden tool chest is cost-effective, as materials like Baltic birch plywood are affordable yet durable․ Proper construction ensures longevity, resisting wear and tear, making it a budget-friendly, long-lasting solution for tool storage, outperforming commercial options in both price and quality․
Customization Options
Free PDF plans for wooden tool chests offer extensive customization, allowing you to tailor sizes, compartments, and features to your needs․ From compact designs to large chests with drawers, these plans enable you to create a tool storage solution that perfectly fits your workspace and tool collection, enhancing organization and accessibility․
Environmental Benefits
Building a wooden tool chest with free PDF plans promotes sustainability by using reclaimed or scrap wood, reducing waste․ Durable wood constructions last longer, minimizing the need for frequent replacements․ Eco-friendly materials and efficient designs make wooden chests a responsible choice for environmentally conscious woodworkers․

Finding the Best Free Plans Online
Explore top-rated free PDF plans for wooden tool chests, offering step-by-step guides․ These designs ensure durability, portability, and customization, perfect for organizing tools efficiently․
Top Websites Offering Free PDF Plans
Popular websites like Fine Woodworking, Instructables, and Pinterest offer free PDF plans for wooden tool chests․ These platforms provide detailed step-by-step guides, catering to both beginners and advanced woodworkers․ Explore a variety of designs, from compact to large chests, ensuring you find the perfect plan to suit your tool organization needs․
How to Evaluate Plan Quality
Assess plan quality by checking for clear, detailed instructions and materials lists․ Look for step-by-step guides, precise measurements, and customization options․ Ensure the plan suits your skill level and project goals․ High-quality plans often include diagrams and photos, making the building process easier․ Positive user reviews and ratings are also strong indicators of reliability and effectiveness․
Downloading and Printing Plans
Download free PDF plans from reputable websites, ensuring they include detailed instructions and measurements․ Print the plans on standard paper or cardstock for clarity․ Verify that the PDF is scalable and compatible with your printer settings; Many plans offer multiple pages, so organize them neatly before starting your project for easy reference․

Essential Materials and Tools Needed
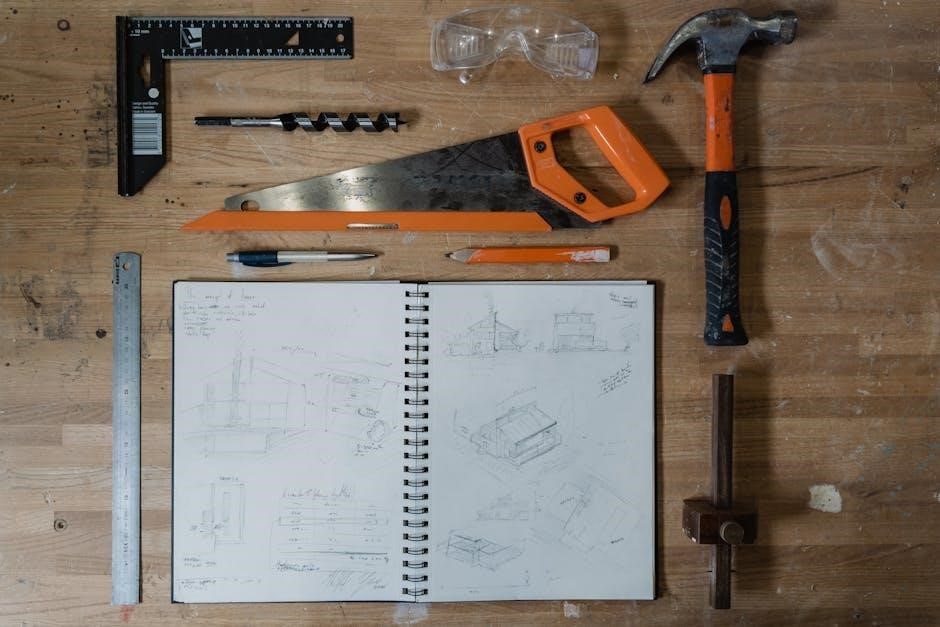
Essential materials include Baltic birch plywood, solid wood, and hardware like drawer slides․ Tools needed are saws, drills, sanders, and a tape measure for precise cuts․
Wood Types and Hardware Requirements
Opt for durable woods like Baltic birch plywood or solid hardwoods for strength․ Hardware includes hinges, handles, and drawer slides․ Choose weatherproof finishes and rust-resistant fasteners for longevity․ Ensure all materials align with your project’s size and design requirements for optimal functionality and durability․
Basic and Advanced Tools
Begin with essentials like saws, drills, sanders, and hammers․ For advanced projects, consider adding routers, biscuit joiners, and power planes․ Ensure all tools are in good condition to achieve precise cuts and smooth finishes, enhancing both functionality and aesthetics of your wooden tool chest․
Budgeting for Your Project
Start by listing materials like Baltic birch plywood, drawer slides, and hardware․ Compare prices for these items across stores to find deals․ Consider the cost of tools you already own versus new ones you might need․ Factor in sandpaper, paint, or stain for finishing․ Opt for a compact size to reduce material costs․ Explore free plans suggesting cost-effective materials or reclaimed wood to save money․ Include shipping costs if ordering online․ Create a detailed budget with a maximum limit, prioritizing essentials over optional features․ Allocate a small buffer for unexpected expenses․ Aim to balance design, functionality, and budget constraints efficiently․

Step-by-Step Construction Guide
Follow detailed instructions to cut, assemble, and finish your wooden tool chest․ Use plywood or solid wood, and incorporate drawer slides for smooth operation․ Perfect for beginners and experienced woodworkers alike, these plans ensure a professional finish with minimal tools and effort․
Cutting and Preparing the Wood
Start by cutting plywood or solid wood according to your plan’s measurements․ Sand all pieces to ensure smooth edges․ Use a saw for precise cuts and clamps to hold wood steady․ For durability, opt for Baltic birch plywood․ Measure twice to avoid errors․ Sand thoroughly before assembly for a professional finish․
Assembling the Chest
Begin by assembling the chest’s base and sides using clamps to hold pieces in place․ Drill pilot holes for screws to avoid splitting the wood․ Secure the bottom panel first, then attach the sides and back․ Use a level to ensure alignment․ Front and top panels come next, with hinges for lid mobility․ Tighten all screws firmly․
Adding Drawers and Compartments
Measure and cut wood for drawers and compartments, ensuring precise fits․ Attach drawer slides to sides for smooth operation․ Secure compartments with screws or nails․ Use plywood or MDF for drawer bottoms․ Sand edges for smoothness․ Install handles or knobs for easy access․ This step enhances organization and accessibility, maximizing storage efficiency․
Design Variations and Sizes
Explore various wooden tool chest designs, from compact chests for small spaces to large, multi-drawer units․ Choose between modern and traditional styles, ensuring your tool chest fits your workspace and tool collection perfectly․
Compact vs․ Large Tool Chests
Compact tool chests are ideal for small spaces, offering efficient storage for essential tools․ Large chests provide ample room for extensive tool collections, with multiple drawers for organization․ Choose based on your tool quantity and workspace size, ensuring functionality without compromising on design or durability․
Modern vs․ Traditional Designs
Modern tool chests feature sleek lines, minimalist aesthetics, and advanced hardware for optimal functionality․ Traditional designs emphasize classic craftsmanship, ornate details, and timeless appeal․ Both styles offer durability and customization options, catering to personal preferences and workspace needs, whether you prefer contemporary efficiency or vintage charm in your wooden tool chest․
Specialized Storage Solutions
Enhance your tool chest with specialized storage solutions like drawers, compartments, and dividers․ These features maximize space and accessibility, ensuring tools are organized efficiently․ Adjustable compartments accommodate various tool sizes, while small trays keep tiny items within reach․ Customizable layouts and high-quality hardware, such as drawer slides, make these solutions ideal for professionals and DIY enthusiasts alike․

Tips for Beginners
Start with simple designs and follow step-by-step guides․ Use proper safety gear and measure tools accurately․ Practice on scrap wood before cutting final pieces for a polished finish․
Common Mistakes to Avoid
Avoid inaccurate measurements and improper material cuts․ Ensure all pieces fit before assembly․ Don’t overlook hardware alignment and drawer spacing․ Double-check plans for clarity and follow safety guidelines to prevent errors․ Use clamps to hold pieces steady during assembly for precise alignment and a professional finish․
Time Management and Safety
Allocate time wisely by breaking the project into stages․ Always wear protective gear like gloves and safety glasses․ Ensure proper ventilation when using chemicals․ Follow tool instructions and maintain a clean workspace to avoid accidents․ Plan ahead to complete each step efficiently and safely, ensuring a successful outcome for your tool chest project․
Seeking Community Support
Engage with online woodworking communities for advice and inspiration․ Forums and social media groups offer valuable insights and troubleshooting tips․ Share your progress and learn from experienced woodworkers․ Participating in these communities can enhance your project experience, providing motivation and practical solutions to challenges you may encounter during your tool chest build;

Organizing Your Tool Chest
Maximize your tool chest’s efficiency by using compartments, dividers, and labels․ This ensures easy access and keeps tools organized, saving time and reducing clutter effectively․
Maximizing Space
Maximizing space in your wooden tool chest involves strategic organization․ Use compartments, dividers, and small bins to separate tools by type or frequency of use․ Consider adding stackable trays or adjustable shelves to utilize vertical space effectively․ Customize the layout to fit your specific tool collection, ensuring every item has its designated spot for easy access and reduced clutter․
Labeling and Accessibility
Labeling your tool chest compartments ensures quick identification of tools, saving time․ Use clear labels or signs for each section․ Incorporate easy-open lids, handles, or drawers for accessibility․ Consider dividers or small bins to keep tools organized and visible․ Adjustable compartments can be tailored to fit specific tools, ensuring everything is within easy reach for efficient workflow․
Maintenance and Cleaning
Regularly clean your wooden tool chest with a soft cloth to remove dust and debris․ Apply a wood conditioner to maintain finish and protect against moisture․ Inspect for pests and ensure dry storage․ Avoid harsh chemicals, as they may damage the wood; Cleaning and conditioning will extend the lifespan of your tool chest․

Advanced Techniques for Customization
Elevate your tool chest with personalized designs, intricate carvings, or custom hardware․ Advanced woodworking techniques allow for unique finishes and functional upgrades, enhancing both aesthetics and utility․
Adding Locks and Security Features
Incorporate robust locks and security mechanisms to protect your tools․ Consider recessed locks, padlocks, or digital combinations for added safety․ Use durable materials and reinforcement to prevent tampering, ensuring your tool chest remains secure and your tools are safeguarded from theft or unauthorized access, while maintaining easy accessibility for legitimate use․
Personalizing the Design
Customize your tool chest with unique engravings, paint, or intricate carvings to reflect your style․ Add personalized compartments or dividers for specific tools, enhancing functionality․ Incorporate decorative hardware or finishes to create a one-of-a-kind piece․ Personalization allows your tool chest to stand out while maintaining practicality, making it both functional and a statement of craftsmanship․
Upgrading Hardware
Enhance your tool chest’s functionality by upgrading hardware such as drawer slides, handles, and locks․ Consider durable materials like metal or brass for lasting performance․ Improved latches and hinges ensure smoother operation, while reinforced brackets add stability․ Upgrading hardware not only boosts durability but also enhances security, protecting your tools from damage or theft effectively․
Safety and Maintenance Tips
Ensure proper tool storage to prevent accidents and damage․ Regularly clean and inspect the chest for wear․ Apply protective finishes to maintain durability and longevity of the wood․
Proper Tool Storage Practices
Organize tools by size and type to maximize space and accessibility․ Use dividers or compartments to separate items, preventing damage․ Keep frequently used tools in easy-to-reach locations while storing heavier items at the bottom for stability․ Regularly clean and inspect tools before storage to maintain their condition and functionality over time․
Regular Maintenance Checks
Inspect the tool chest for damage or wear regularly․ Clean the interior and exterior to prevent dust buildup․ Check hardware for tightness and lubricate hinges if needed․ Ensure all tools are dry before storage to prevent rust․ Address any issues promptly to maintain the chest’s durability and functionality over time․
Handling Common Issues
Address warping by ensuring proper wood drying and sealing․ Tighten loose joints with wood glue and clamps․ Prevent rust on tools with rust-inhibiting sprays․ For scratched finishes, sand lightly and reapply sealant․ Consult woodworking forums or guides for tailored solutions to specific issues, ensuring your tool chest remains in optimal condition․
Building a wooden tool chest using free PDF plans is a rewarding project, offering cost-effective, customizable storage solutions․ Start your DIY journey today and enjoy the satisfaction of creating something durable and timeless for your tools․
Recap of Key Points
Free PDF plans for wooden tool chests offer cost-effective, customizable solutions for organizing tools․ Durable and eco-friendly, these designs cater to all skill levels, providing step-by-step guides․ From compact to large chests, modern to traditional styles, these plans ensure functional and stylish storage, perfect for woodworkers seeking practical and lasting results․
Encouragement to Start Your Project
Embark on your woodworking journey with free PDF plans for wooden tool chests․ These step-by-step guides make it easy to begin, offering customizable designs for all skill levels․ Start organizing your tools today and enjoy the satisfaction of creating something durable and functional․ Your new tool chest awaits—let’s get building!